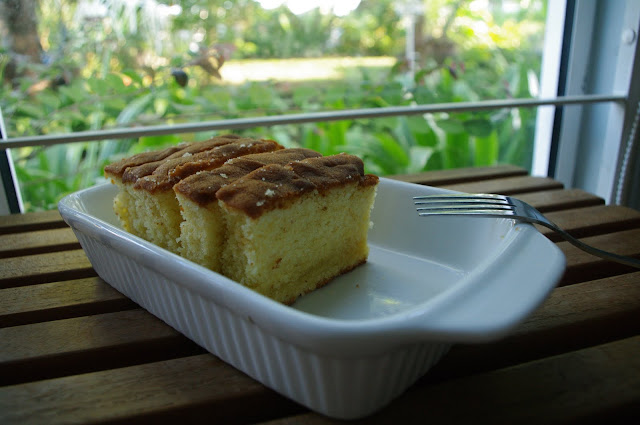
This was the 1st cake I ever baked in my life, and the first since getting my beloved Kitchen Aid KA5 Bowl-Lift Mixer. Before this, I could only bake deserts which do not require mixer to bake such as muffins, brownies, pies, etc.
My sister-in-law, who is an experienced baker, advised that novice bakers should always start with a simple butter cake. And that’s what I did.
Without much cake-baking experience, I searched the internet for butter cake recipes and finally decided to try Amy Beh’s Kuali Buttercake. To be honest, her recipe is totally unfriendly to first-timer. I did lots of side research on creaming step, emulsification of eggs to ensure I get it right.
Butter Cake (from: Amy Beh, Kuali) Yield: 8” Round Cake Ingredients
Method 1. Grease and line a 20cm cake tin (or 8” tin) with greased greaseproof paper. Preheat oven to 170°C. 2. Cream butter and sugar until light and creamy. Add eggs one at a time, beating well after each addition until mixture is light and fluffy. Add essence. 3. Fold in sifted flour gradually to mix. Finally stir in milk. Mix until well combined. 4. Turn out mixture into prepared tin. Level out mixture at the sides but allow a shallow well in the centre. This is to enable the cake to level up evenly during baking. 5. Bake in preheated oven for 55-60 minutes or until cooked through when tested with a skewer. |
So, how did my first cake turn out? Pretty good actually for 1st try, it is buttery with light crumbs, much better than the ones sold at bakery nearby. Since this 1st try, I have baked this cake another 3 times - first to practice my frosting skills, the other for Linda’s birthday, and lastly, a delightful orange zest twist for Uncle J’s birthday. This would be a recipe that I would bake again and again. One that I would turn to if I ever needed to produce a fool-proof cake in a jiffy.
Tips:
- Make sure you use good quality butter (either SCS or Golden Churn) to make this cake – it makes all the difference. Butter should be at room temperature, i.e. it should leave an indentation when touched by fingertips but still feel firm. However, make sure your butter is not too soft or melted when you start or you may get uncooked layers in the cake.
- For the creaming step, I start by mixing the butter on its own first. Then add sugar, little by little. Start mixer medium, then high speed and beat about 8 minutes until light & fluffy. The batter should be cream-cheese colour, doubled in volume and feels light when scraped.
- Eggs & milk should be at room temperature. Use Size M eggs which is between 52g to 59g with shell. 4 eggs (without shell) should yield about 200g. I add the eggs by big tablespoon at a time, rather than one egg at a time. Just an extra careful step to prevent curdling.
- I added the flour & milk alternately. ½ flour, ½ milk, ¼ flour, ½ milk and lastly ¼ flour. I added more flour (1/2) initially so that more flour is coated with batter & less of it will form gluten when mixed with milk which can make the cake tough & hard.
- Final batter should be thick & fluffy, should drop from scoop at the count of 3.
- To ensure even heat distribution and to prevent doming in center, I use home-made cake strips and flower nail.
- Before placing pan in oven, gently tap pan on countertop to remove air bubbles. Then, gently swirl the pan so that the batter rise slightly at the side, and not the center.
- To test for doneness, use a toothpick. Other signs include pulling from the sides and spring back on touch. I prefer to over bake slightly so that the sides are browned as well.
- Most cake, including this one, actually tastes better after leaving it for half-a-day. So, plan your baking/serving time accordingly.
Future Improvements:
- If you noticed in my picture above, there’s a layer of transparent, uncooked layer at the bottom of the cake. I think it is because I put the cake pan on a baking sheet, and this cause uneven heat distribution. Next time, I will place the cake pan on open rack.
- Slightly too sweet for my liking, I will reduce sugar further to 190g the next round.
© copyright fiddling with recipe 2011

No comments:
Post a Comment
It is all about sharing and good conversation here. we'd love to hear your thoughts.
Be sure to check back back, we do make every efforts to reply to your comments here.